Manual Driver Install
Why install drivers Manually?
The best option is always to allow Windows to automatically install your drivers upon detecting your lead being plugged into the USB port. Always make sure your PC is connected to the internet as Windows will usually need to download them from a library.
However, sometimes drivers may not install correctly. Once that happens your PC will cease to auto detect new drivers upon plug in. This will take manual intervention to resolve. First download the manual drivers for your Windows operating system (see links on this page).
Unzip the downloaded file to a temporary folder on your hard drive and remember its location.
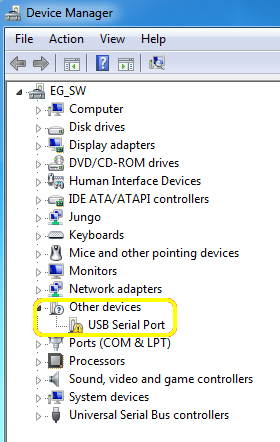
Go to Windows Device Manager (how to?). Now plug your lead into a USB port. If the lead has not installed correctly it will likely be showing up under either ‘Unknown Devices’ or ‘Other Devices’. You need to click just to the left of these titles to expand them and see what is there. The entry will have a yellow symbol with an exclamation mark (!). This denotes drivers have not installed correctly. Now right click on the entry

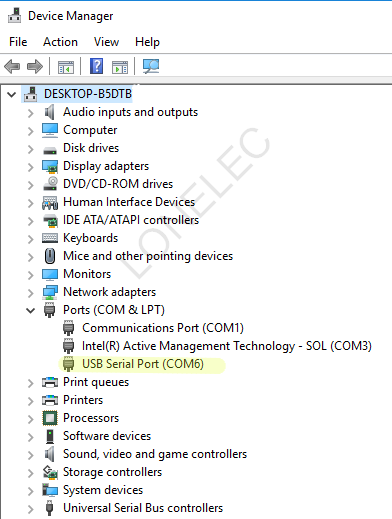
Right click on the entry and select ‘Update driver’ from the sub-menu. Now you will be given an option between letting Windows looking for drivers or you manually browsing. Choose the browsing option. Direct to the temporary folder you previously unzipped your files to. OK this and the drivers should soon be correctly installed. If so, the entry for your lead should now appear under ‘Ports (COM & LPT)’ with the Com number allocated also showing. In this example it is Com6. Certain diagnostic softwares may ask you for the number so they can communicate with your lead.

Your lead should now be ready to use.
